Solway Woolscapes
   Solway Woolscapes

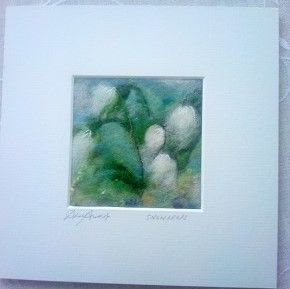
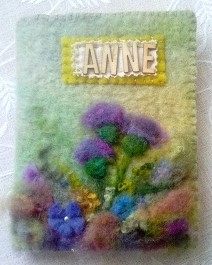
This has been made using an old wool blanket that I have  hand dyed. It could also be made using wool felt (not acrylic as it is not porous enough to be able to successfully felt with). I cut an oblong shape, rounded one end and then felted in the grass, flowers etc before I stitched it up using a blanket stitch. The flowers were cut from dyed prefelt and pearls have been sewn in the centres.


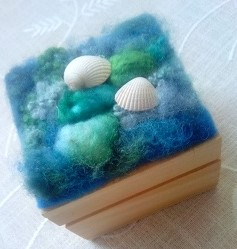
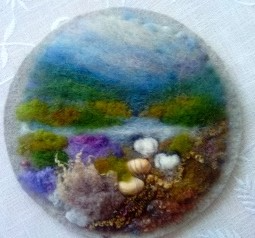
I purchased the box in The Works. I felted together a seascape using fleece which had been hand dyed in blue and turquoise colours. I also incorporated a little prefelt. The shells were  glued on though they could be stitched if preferred. The landscape was then trimmed to size and glued on to the top of the box.


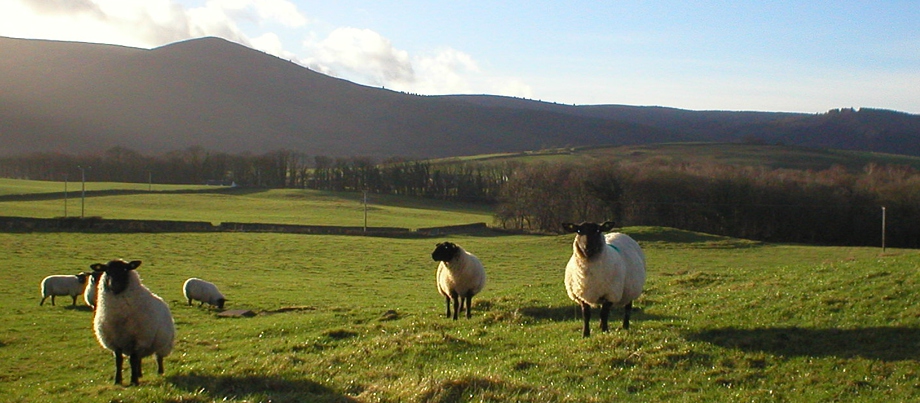
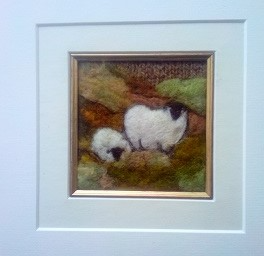
This picture has been made up with strips of hand dyed prefelt. I have cut them into random shapes and laid on to the backing then felted along the outlines as if I was stitching them. The grass in the foreground and the sheep have been felted using fleece to give added interest and texture.

I supply hand dyed prefelt and fleece in my experimental packs to be found under the experimental kits page. For further information on this technique have a look at the video on this website.


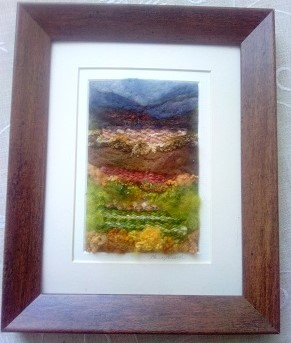
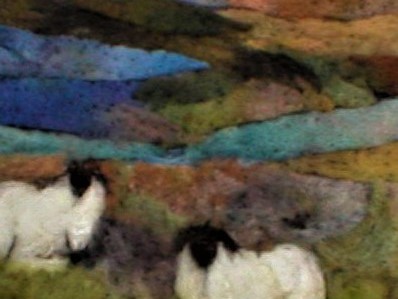
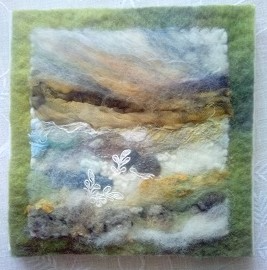
Again using prefer strips but overlaying it with fleece and adding natural colour fleece for the rocks. I have felted in the sheep using fleece.This has been framed in a box frame. I use box frames quite a lot and purchase them at The Range. These can also be found online via eBay sellers. I usually remove the glass as it shows the colour and texture of my work.


Once again  the same technique of combining prefelt with fleece but this time I knitted a square using brown wool. To stabilise it so that I could felt on it I ironed a fusible stabiliser on the back. This one has only a few strips of prefelt and more fleece felted over it.

This is a great way to use up all those odds and ends of wool plus you can combine different colours. I have a few more to give you further inspiration below!


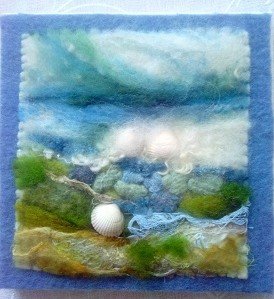
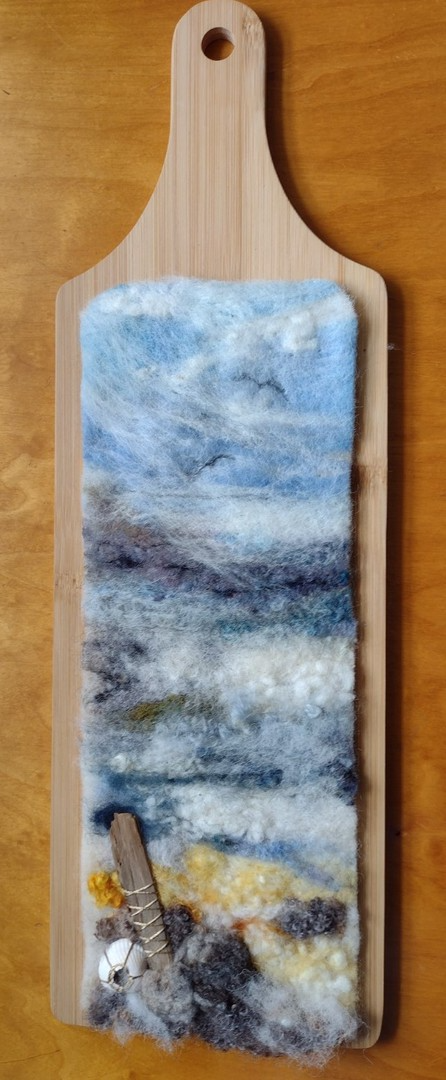
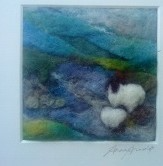
I have felted this picture usiI have applied a bit of hand dyed bandage for the waters edge, bits of prefelt , small felted rocks and shells . Once I had finished it I blanket stitched it on to a square piece of felt then glued it on to a canvas. With so much texture I didn't want to hide it behind glass!


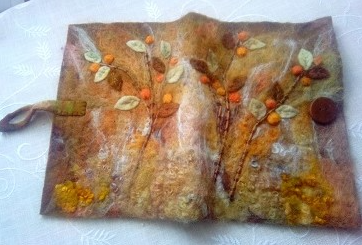
Still staying on the theme of mixed medium. this one has bits of lace stitched in, hand dyed muslin, strips of prefelt as well as fleece felted in. I also made some 'silk paper' using raw cocoon strippings and laid thin layers of fleece over the paper to felt in. This helped to secure it and gave an atmospheric look to the piece. This is a technique which that I  teach on one of my classes 


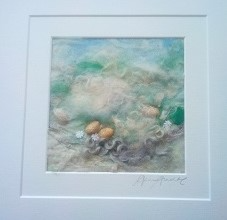
Similar techniques to the above but this time I have stitched on pistachio shells to create the look of a seashore! I often stitch on pearls, bits of thin twigs, netting, feathers etc to give added interest. All these things can be used in your felt pictures!  


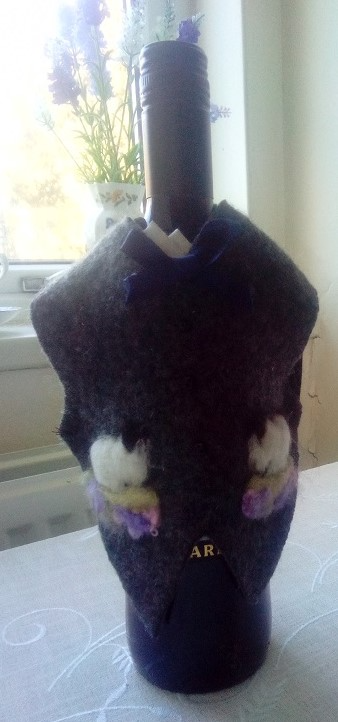
A great way to dress up a wine or whisky bottle. just make a wee waistcoat! The front has been cut from a piece of Harris tweed and the back from black acrylic felt. Once I have felted onto the front I stitch along the top and just put a couple of stitcheds inthe side to hold it together. A few buttons down the dront and a couple of white squares of felt for the collar. You could also make this to reflect the recipients interest such a felting in a fish for a fisherman, chickens, toadstools...the possibilities are endless. A great way to gift a bottle. I have made several at Christmas with snow themes so that the bottle can be displayed.

It is easy enough to make the pattern however if you are not confident in doing so then please email me and i will send a free PDF pattern sheet.


Snowdrops. 

This has been felted on to a paper napkin and enhanced with a few embroidery stitches. You can achieve fantastic pictures by using paper napkins for the background. For those interested in exploring this technique then have a lookk at the Fox kit under the new kits page . The kit has full instructions for this technique as well as how i came to develop the idea of using napkins. As well as all you need to produce the fox there are is also a pack of images so that you can make a few other pictures. Its great fun and a lot easier than you would think. You don't have to add stitching but where there are flowers in the images then i generally do. i am a great believer in SLOW STITCHING and always hadve a small basket of odds and ends to stitch up when I have a moment to spare. It helps to relax the mind and also quite often these are the times that I come up with new ideas to try out, it is all part of the creative process.

I love making these! I have used extra thick wool felt that I puchase my the metre. I don't felt into it but just use it to display my work. this one is thick enough to make a nice fiorm top for a basket! I felted on to my polyester fleece as usual then cut it into a circle and stitched it on to a larger circle of the thicker felt. This can then be huung on the wall. I always think that circles really bring out the focus in the picture and take your eyes to the centre of the picture.


A cute way to give a pot of honey. I have used a styrofoam ring that the pot can sit in. I would white prefelt around the ring to give me a nice base to felt into. The bees are actually cut out from apper napkins and fused on adn I have lightly felted over them, the flowers are cut from prefelt and I have poked the centre in with my felting needle to give them a 3D effect. The bee on top of the lid is a piece of white prefent that I have rolled into a sausage shape and felted  in balck and yellow stripes and added little wings , again cut from prefelt. The bee has been hot glued on. the grass is lovely textured fleece that i have felted into the styrofoam.


I always enjoy weaving. I have a rigid heddle loom and a small Louet one but often I just use a bit of cardboard and weave in different textures of wool especially bits left over from my spinning projects. Once I have woven a pice I iron fusible backing on to it to stabilise the weaving .I can then felt into it adding other elements or enhancing the weaving. this is also a great project to do with children as they can do the weaving and Mum (or Dad) can do the felting so it is worth keeping all thos odd bits of knitting wool or tapestry wool. Plus you can also felt strips of yarn into a picture if it is pure wool. recycling at its best!


Book covers are easy to make if felting onto an item which is already partially felted. this is an old sweater that I shrunk in the ashing macine. I felted it just enough to make it essy to cut without fraying. You could also knit up a large  pure wool rectangle and shrink it a little. I have stiched twigs on to this piece and randomly felted all over it with Autumn colours then added leaves. these were maf=de by felting up small pices then cutting out the shape. I then secured them with a single sttich in the centre to give them the 3D effect.


A notebook cover this time. The thistles ahve been felted on to a hand dyed piece of blanket. My name has been added with little wooden initials that I bought in The Range and I have hot glued them on. The inside of the cover has pockets for my notebook, pencil etc. 


Using the thick woolen felt once again!the banner has been made with all kinds of mediums. The felting has been done on a piece of white prefelt. The rocks are from an old grey sweater than I have felted and cut up into tiny rock shapes. A little bit of white crepe bandage is in there somewhere!! this is a prject that I have done with a class several times and it is alwasy great fun as there is so much to inspite when you look at nature. I have mounted the felted piece on to the thick wool felt sot hat it is rigid. I use odd shaped branches or driftwood for hangers. 


Print | Sitemap
© Solway Woolscapes